HOWTO: Integrating Gauge with Travis CI
Travis CI is a hosted, distributed continuous integration service used to build and test software projects hosted at GitHub.
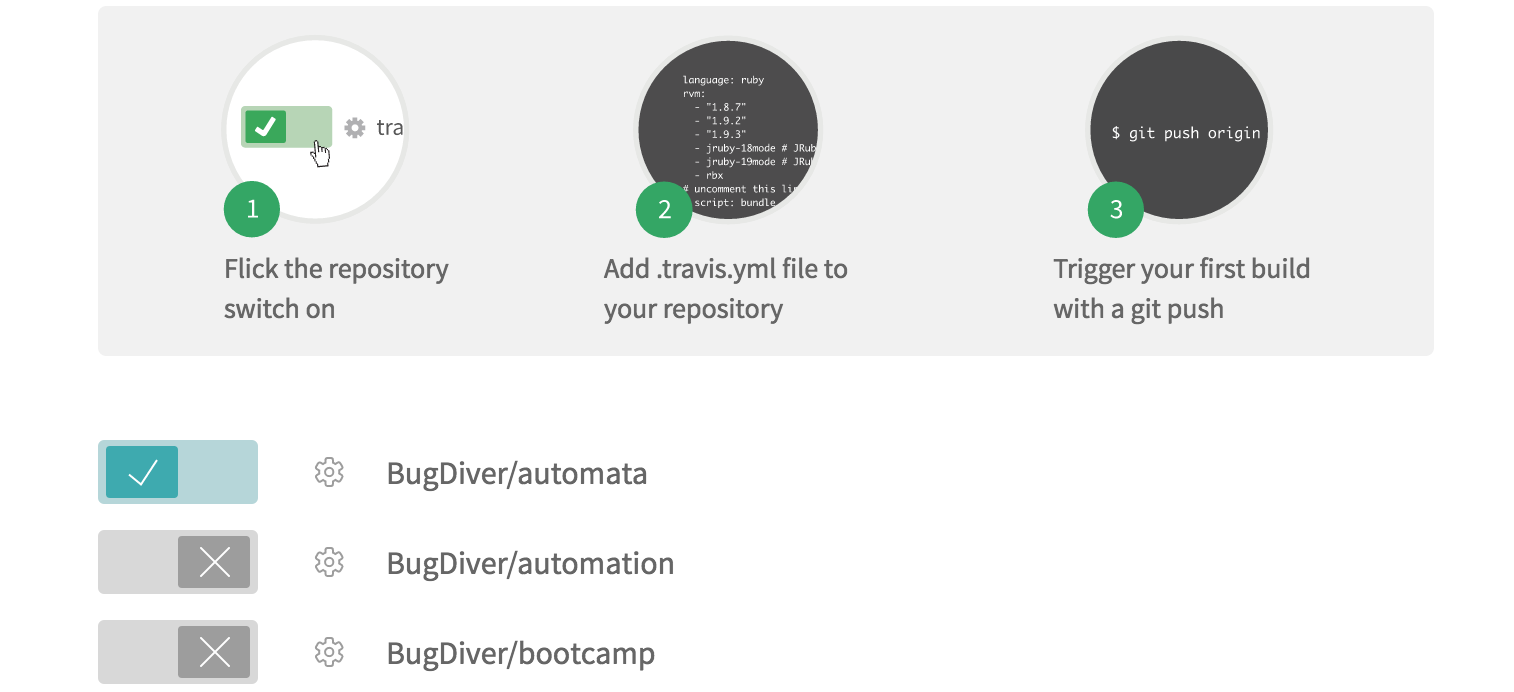
Login to Travis CI and goto
accountsmenu.- Choose your project repository to be built and flick that switch on.
Creating tasks
- Create a
.travis.ymlfile in your project root. - Add these lines in
.travis.ymlaccording to the platform on which you want to build.
OS X
  language:
      -  language_name

  os:
      - osx

  install:
      - brew install gauge
      - gauge install html-report

  script: 'gauge run specs'

  sudo: false
Linux
  language:
      - language_name
  os:
      - linux
  install:
      - sudo apt-key adv --keyserver hkp://pool.sks-keyservers.net --recv-keys 023EDB0B
      - echo deb https://dl.bintray.com/gauge/gauge-deb stable main | sudo tee -a /etc/apt/sources.list
      - sudo apt-get update
      - sudo apt-get install gauge
      - gauge install html-report

  script: 'gauge run specs'

  sudo: true
- If you want to run only a subset of specs, you can use Tagged Execution.
Example: add
script: gauge run --tags "tag1 & tag2" specsin your.travis.yml. - Adding a flag
-pruns them using Parallel Execution. Example:script: gauge run -p specsin your.travis.yml. - Run against specific Environments using the
--envflag. - See the Help for list of all the flags that can be used.
Reports
Goto your project on travis and see the console output.
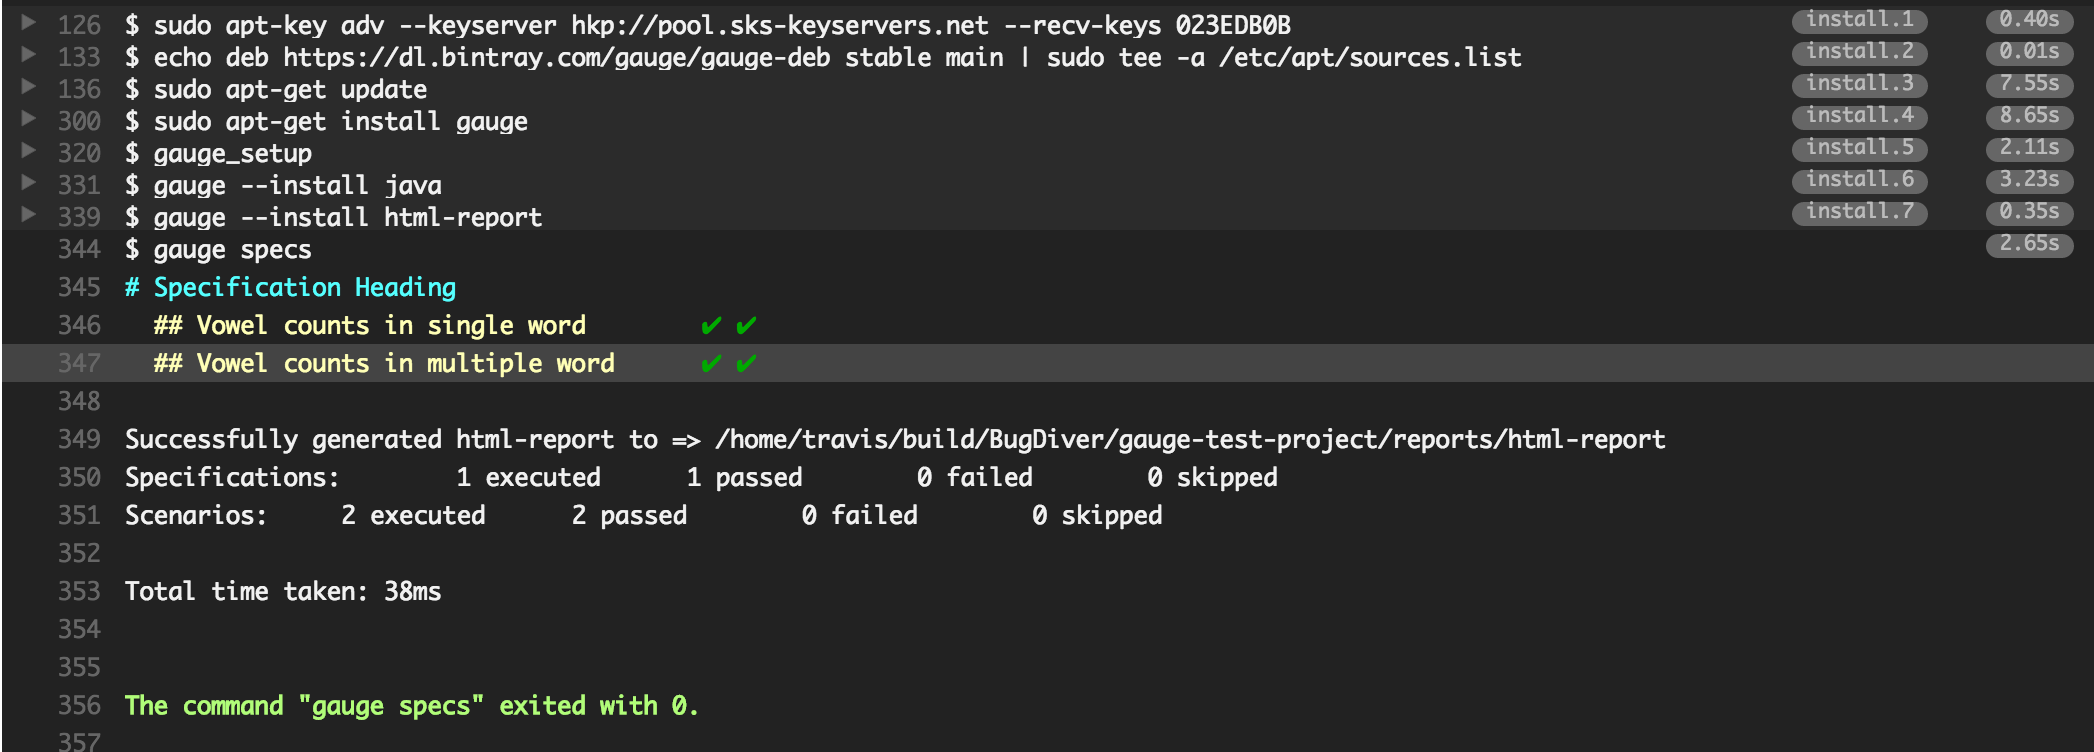
Gauge generates
html-reportafter execution whose location can be set by environment variablegauge_reports_dir. This defaults toreportsdirectory in the Gauge project.You can upload Gauge execution reports to your choice of hosted web server. Read more for uploading artifacts.